
There’s nothing quite as disappointing as opening your freezer and realizing your ice maker isn’t keeping up. If you’ve been searching for “How To Adjust Ice Maker To Make More Ice,” you’re already on the right path to fixing the problem. The truth is, getting your ice maker to produce more ice doesn’t require expert skills or complicated steps, just the right adjustments in the right places.
This intro guide will walk you through simple, practical tweaks that can noticeably boost ice production and keep your freezer stocked at all times. Let’s uncover how a few small changes can make a big difference in your daily convenience.
Why Your Ice Maker Isn’t Producing Enough Ice
An ice maker is a convenient appliance, but when it starts producing less ice than usual, it can disrupt your daily routine especially during hot days or gatherings. If you’ve noticed that your ice maker isn’t keeping up with your needs, there could be several underlying causes. Understanding these issues can help you troubleshoot effectively and restore your ice-making efficiency.
Here are the most common reasons why your ice maker isn’t producing enough ice:
1. Low Water Supply
If your ice maker isn’t receiving enough water, it can only make a limited amount of ice. Check the water line for kinks, clogs, or leaks. Also, ensure the water inlet valve is fully open.
2. Clogged Water Filter
A dirty or clogged water filter restricts water flow, resulting in smaller or fewer ice cubes. Replacing the water filter every six months—or according to your manufacturer’s instructions—can prevent this issue.
3. Incorrect Temperature Settings
Ice makers need the freezer to be at the optimal temperature, usually between 0°F (-18°C) and 5°F (-15°C). If your freezer is too warm, ice production will slow down.
4. Dirty or Frosted Ice Mold
Ice molds can accumulate mineral deposits or frost, which can prevent proper ice formation. Regular cleaning of the mold ensures consistent ice output.
5. Faulty Ice Maker Components
Mechanical issues such as a malfunctioning motor, thermostat, or control module can reduce ice production. If your ice maker shows signs of irregular cycling or no operation at all, these components may need repair or replacement.
6. High Usage or Demand
If you’re using ice more quickly than the machine can produce it, it may seem like it’s not making enough. Ice makers have a production limit, usually between 2–4 pounds per day for standard models.
7. Frozen Water Line
In some cases, the water line supplying the ice maker may freeze. This blocks water flow entirely and stops ice production. Inspect the line and thaw it if necessary.
8. Power or Connection Issues
Loose or damaged electrical connections, or power fluctuations, can interfere with the ice maker’s operation. Ensure the appliance is properly plugged in and that the outlet is functioning correctly.
If your ice maker isn’t producing enough ice, it’s often due to water supply issues, temperature settings, or internal mechanical problems. Regular maintenance, cleaning, and monitoring of water flow can significantly improve ice production. By identifying and addressing these common causes, you can ensure your ice maker consistently delivers the ice you need.
Tools & Simple Items You May Need
When your ice maker isn’t producing enough ice, having the right tools and items on hand can make troubleshooting and repairs much easier. Even simple items around the house can help you inspect, clean, or fix common issues safely and efficiently. Preparing these tools before starting ensures you won’t have to stop midway through the process.
1. Screwdrivers (Phillips and Flathead)
Most ice makers have panels or covers that need to be removed to access internal components like the water inlet valve, motor, or ice mold. A set of screwdrivers allows you to safely remove these parts without causing damage.
2. Multimeter
A multimeter is essential for checking electrical connections, switches, and continuity in the ice maker’s circuits. This helps identify issues such as a faulty thermostat, motor, or control module.
3. Towels or Cloths
Water spills and frost buildup are common when inspecting ice makers. Towels or cloths help keep the area clean and prevent water from spreading inside your freezer or kitchen.
4. Bucket or Container
When draining ice molds, disconnecting water lines, or catching melted ice, a bucket or container will prevent messes and make the process more organized.
5. Replacement Water Filter
A clogged or old water filter restricts water flow, which directly reduces ice production. Having a replacement filter ready allows for a quick swap to restore proper water supply.
6. Soft Brush or Toothbrush
For cleaning small crevices, ice molds, and hard-to-reach areas, a soft brush or toothbrush is perfect. It removes mineral deposits, frost, or debris without scratching delicate surfaces.
7. Warm Water
Warm water can be used to safely thaw frozen water lines or dissolve frost buildup in the ice mold. Avoid using sharp objects or extreme heat, as they may damage components.
8. Flashlight
Ice makers often have dark areas or internal compartments that are hard to see. A flashlight ensures you can spot leaks, clogs, or frost buildup easily.
9. User Manual
Your ice maker’s manual is a vital reference for troubleshooting, replacement part numbers, and safety instructions. It can guide you through manufacturer-specific steps that generic guides may not cover.
Having these simple tools and items ready can save you time and prevent mistakes while troubleshooting your ice maker. From checking electrical connections to cleaning ice molds and replacing filters, these items make the repair process smoother and safer. With preparation and the right tools, restoring your ice maker’s full ice production becomes a manageable and efficient task.
How To Adjust Ice Maker To Make More Ice (Step-by-Step)
A fully functioning ice maker is a lifesaver, especially during hot days or when hosting guests. But if your ice maker isn’t producing enough ice, it can quickly become frustrating. The good news is that, in most cases, adjusting your ice maker and performing some simple maintenance can significantly boost ice production. Follow these step-by-step instructions to ensure your ice maker works at its full potential.
Step 1: Check the Freezer Temperature
Ice makers need the right freezer temperature to produce ice efficiently.
-
Set your freezer to 0°F (-18°C) to 5°F (-15°C).
-
If the freezer is too warm, ice production will slow down.
-
Allow a few hours for the temperature to stabilize after making adjustments before evaluating ice output.
Step 2: Inspect the Water Supply
A steady and adequate water flow is crucial for making ice.
-
Check the water line for kinks, clogs, or leaks.
-
Ensure the water inlet valve is fully open.
-
If the water line is frozen, carefully thaw it with warm water.
Step 3: Replace or Clean the Water Filter
A blocked or old water filter reduces ice production by restricting water flow.
-
Locate the water filter inside the fridge or ice maker system.
-
Replace it with a new, compatible filter if it’s clogged or overdue.
-
Clean reusable filters according to the manufacturer’s instructions.
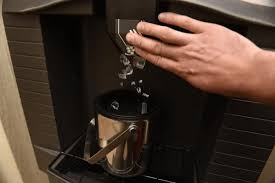
Step 4: Adjust the Ice Maker Settings
Some ice makers allow you to control the size and amount of ice produced.
-
Look for a lever, switch, or small adjustment screw inside the ice maker labeled for ice size.
-
Turn the screw slightly toward larger ice cubes to allow more water per cycle.
-
Avoid over-adjusting, as this can cause overflow or incomplete freezing.
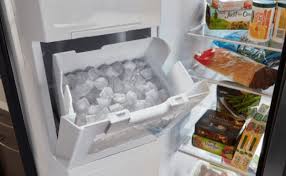
Step 5: Clean the Ice Mold
Mineral deposits, frost, or debris in the ice mold can limit production.
-
Remove the ice tray or mold as instructed in your manual.
-
Clean it with warm water and a soft brush.
-
Dry thoroughly before reattaching to the ice maker.
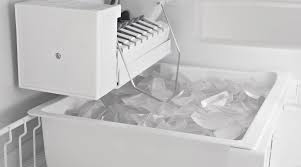
Step 6: Inspect the Ice Maker Components
Mechanical issues can prevent the ice maker from producing enough ice.
-
Check that the motor, thermostat, and control module are working correctly.
-
Use a multimeter to test electrical connections if necessary.
-
Replace any faulty components following your user manual’s guidelines.
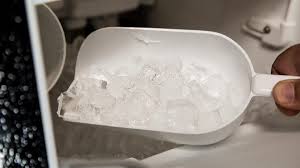
Step 7: Manage Ice Usage
Sometimes low ice production isn’t the problem—high usage may be.
-
Avoid opening the freezer frequently, as it lets warm air in and slows ice production.
-
Consider keeping a backup ice bin for periods of high demand.
Adjusting your ice maker to make more ice doesn’t have to be complicated. By ensuring the freezer is at the correct temperature, maintaining a steady water supply, cleaning the ice mold, and fine-tuning the ice maker settings, you can restore full ice production. Regular maintenance and mindful usage will keep your ice maker working efficiently, so you’ll never run short of ice when you need it most.
When Adjusting Isn’t Enough: Signs You Need Repairs or Replacement
Sometimes, adjusting your ice maker and performing basic maintenance isn’t enough to restore full ice production. Ice makers, like any appliance, have mechanical parts that wear out over time. Knowing the warning signs can help you decide whether it’s time for professional repair or a complete replacement, saving you frustration and avoiding further damage.
1. Ice Production Remains Low Despite Adjustments
If you’ve checked the water supply, temperature, and settings, but your ice maker still produces very little ice, this indicates an underlying mechanical or electrical issue.
2. Ice Cubes Are Small, Misshapen, or Hollow
Irregularly shaped or hollow ice cubes often point to problems with the water inlet, freezing cycle, or the ice mold itself. Persistent issues after cleaning and adjusting usually require component repair.
3. Ice Maker Doesn’t Turn On or Cycle Properly
A non-functioning ice maker that fails to cycle through ice production may have a faulty motor, thermostat, or control module. This is a clear sign that professional repair or replacement is necessary.
4. Unusual Noises
Grinding, buzzing, or clanking sounds coming from the ice maker are often indicators of worn-out motors or mechanical failures. These sounds shouldn’t be ignored, as they can lead to complete failure.
5. Water Leaks or Frozen Lines Persist
If you consistently find water leaks or frozen supply lines despite proper installation and adjustments, the water inlet valve or internal components may be defective. This typically requires repair or replacement.
6. Frequent Ice Jams
Regular ice blockages in the tray or chute after adjustments suggest mechanical problems with the ejector mechanism or motor, which often cannot be fixed by simple adjustments.
While adjusting your ice maker can resolve many minor issues, persistent problems such as low production, unusual noises, water leaks, or mechanical failures signal that repairs or replacement are needed. Recognizing these signs early ensures you avoid prolonged inconvenience and prevents further damage, helping you maintain a reliable ice supply.
Preventive Maintenance Tips to Keep Ice Production High
Maintaining consistent ice production isn’t just about fixing issues when they arise, it’s about preventing problems before they occur. Regular preventive maintenance ensures your ice maker continues to operate efficiently, extends its lifespan, and reduces the need for costly repairs.
1. Keep the Freezer at the Optimal Temperature
-
Maintain your freezer between 0°F (-18°C) and 5°F (-15°C).
-
Avoid overfilling the freezer, as this can block airflow and affect ice production.
2. Replace or Clean the Water Filter Regularly
-
Replace the water filter every six months or as recommended by the manufacturer.
-
Clean reusable filters to remove mineral buildup that can restrict water flow.
3. Clean the Ice Mold and Trays
-
Remove and clean ice trays or molds with warm water and a soft brush every few weeks.
-
This prevents mineral deposits, frost, and bacteria buildup that can reduce ice output.
4. Inspect Water Lines and Inlet Valves
-
Check water lines for kinks, leaks, or frozen sections.
-
Ensure the water inlet valve is functioning properly and supplying a steady flow.
5. Monitor Ice Maker Components
-
Regularly check the motor, thermostat, and ejector mechanism for signs of wear or unusual noises.
-
Address any small issues immediately to prevent them from becoming larger problems.
6. Limit Ice Usage and Frequent Freezer Openings
-
Avoid constantly opening the freezer door, as warm air can slow ice production.
-
Keep a backup ice bin during high-demand periods to reduce strain on the ice maker.
7. Schedule Professional Maintenance if Needed
-
For built-in or complex ice makers, consider a yearly professional inspection.
-
Technicians can clean internal components, check electrical connections, and ensure everything is functioning optimally.
Preventive maintenance is the key to keeping your ice maker producing ice efficiently and consistently. By monitoring freezer temperature, cleaning molds, maintaining water lines, and addressing small issues early, you can avoid common problems and enjoy a steady supply of ice all year round. Regular care not only boosts performance but also extends the life of your ice maker, saving time and money in the long run.
Conclusion
Understanding How To Adjust Ice Maker To Make More Ice can transform your kitchen experience, ensuring a steady supply of ice whenever you need it. By carefully tweaking settings, checking water flow, and maintaining your ice maker, you can boost ice production without unnecessary stress or repairs. Remember, small adjustments can make a big difference, and consistent care prevents future issues, keeping your ice maker running at peak performance.